この記事ではwebpackが使われている既存のLaravelプロジェクトにVueを導入する方法を紹介します。
デフォルトのLaravelでは、フロント部分はbladeで実装しています。
そこに、一部分だけVueを導入していきます。
新規にLaravel×Vueのプロジェクトを作成する記事はたくさんありますが、既存のプロジェクトに一部Vueを導入するといったものがあまりなかったのでこういったケースをお求めの方の参考になれば幸いです。
この記事を読むメリット
- 既存のLaravelプロジェクトにVueを一部分導入できるようになる
- VueとLaravelの連携方法が理解できる
Reactを導入する方法が知りたい方は以下記事が参考になります。
webpackとviteどちらを使っているかで設定が若干異なるので別の記事を用意しています。
前提
既存のLaravelプロジェクトが作成済みであることを前提としています。
Laravelプロジェクトの作成とローカル環境の構築について知りたい方は、以下記事を参考にしてください。

Laravel sailを使った超簡単なローカル環境構築方法となっています。
webpackが使われているプロジェクトが対象です。
Vueを部分的に導入する流れ
Vue導入の全体的な流れは以下のようになります。
- 必要なパッケージのインストール
- webpackの設定をVue用に更新する
- Vueコンポーネントの作成
- Vueコンポーネントのエントリーポイントを設定
- 必要な箇所にVueコンポーネントを埋め込む
- ビルドして動作確認
1つずつ実際のコードを交えて紹介していきます。
必要なパッケージのインストール
まずは必要なパッケージをインストールします。
npm install vue@3
npm install vue-loader@16 @vue/compiler-sfc --save-dev
npm install @babel/core @babel/preset-env babel-loader --save-devinstallが完了すると、package.jsonに以下が追加されているはずです。
"dependencies": {
        "vue": "^3.5.5"
},
"devDependencies": {
   "@babel/core": "^7.25.2",
    "@babel/preset-env": "^7.25.4",
    "@vue/compiler-sfc": "^3.5.5",
    "babel-loader": "^9.1.3",
    "vue-loader": "^16.8.3"
}
これで完了です。
webpackの設定をVue用に更新する
続いてwebpackの設定をVue用に更新していきます。
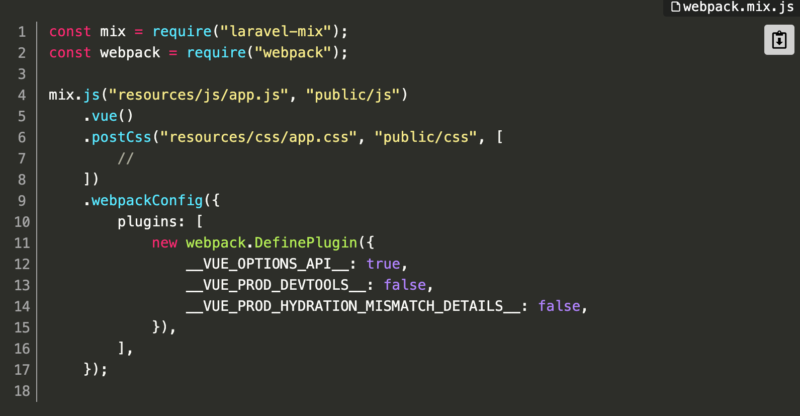
Laravel Mixをしていると、「webpack.mix.js」があるので以下のように書き換えます。
const mix = require("laravel-mix");
const webpack = require("webpack");

mix.js("resources/js/app.js", "public/js")
    .vue()
    .postCss("resources/css/app.css", "public/css", [
        //
    ])
    .webpackConfig({
        plugins: [
            new webpack.DefinePlugin({
                __VUE_OPTIONS_API__: true,
                __VUE_PROD_DEVTOOLS__: false,
                __VUE_PROD_HYDRATION_MISMATCH_DETAILS__: false,
            }),
        ],
    });
「src/resources/js/app.js」の内容をVue用にpulic配下に出力するために「.vue()」を追加しています。
さらにwebpackCoinfigのVue用の設定を追加しています。
Vueコンポーネントの作成
続いてVueコンポーネントを作成していきます。
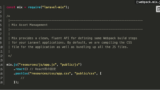
コンポーネントファイルを「src/resources/js/components/ExampleComponent.vue」として作成します。
<template>
    <div>
        <h1>Hello, Vue!!</h1>
    </div>
</template>

<script>
export default {
    name: "ExampleComponent",
};
</script>

<style scoped>
h1 {
    color: blue;
}
</style>
「Hello, Vue!!」と表示されるシンプルなコンポーネントとなっています。
Vueコンポーネントのエントリーポイントを設定
続いて、先ほど作成したコンポーネントファイルのエントリーポイントを設定します。
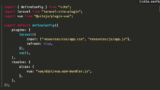
「src/resources/js/app.js」を以下のように修正します。
import { createApp } from "vue";
import ExampleComponent from "./components/ExampleComponent.vue";

const app = createApp({});
app.component("example-component", ExampleComponent);
app.mount("#app");
これでエントリーポイントの設定は完了です。
必要な箇所にVueコンポーネントを埋め込む
続いて必要箇所にVueコンポーネントを埋め込みます。
今回は全体で読み込ませるために「resources/views/layouts/app.blade.php」に記載しています。
<!DOCTYPE html>
<html lang="{{ str_replace('_', '-', app()->getLocale()) }}">
    <head>
        <meta charset="utf-8">
        <meta name="viewport" content="width=device-width, initial-scale=1">
        <meta name="csrf-token" content="{{ csrf_token() }}">

        <title>{{ config('app.name', 'Laravel') }}</title>

        <!-- Fonts -->
        <link rel="stylesheet" href="https://fonts.googleapis.com/css2?family=Nunito:wght@400;600;700&display=swap">

        <!-- Scripts -->
        <link rel="stylesheet" href="/css/app.css">
    </head>
    <body class="font-sans antialiased">
        <div class="min-h-screen bg-gray-100">
            @include('layouts.navigation')

            <!-- Page Heading -->
            <header class="bg-white shadow">
                <div class="max-w-7xl mx-auto py-6 px-4 sm:px-6 lg:px-8">
                    {{ $header }}
                </div>
            </header>

            <!-- Page Content -->
            <main>
                {{ $slot }}
                <div id="app">
                    <example-component></example-component>
                </div>
            </main>
        </div>
    </body>
    <script src="/js/app.js"></script>
</html>
「id=”app”」の要素を追加しています。
そして「<script src=”/js/app.js”></script>」でトランスパイルされた「src/resources/js/app.js」の内容を読み込んでいます。
「<script src=”/js/app.js”></script>」は必ず対象id要素よりも後で読み込むようにします。
デフォルトで「<script src=”/js/app.js”></script>」はheadタグ内に書かれていることがあるのでそれだと動作しません。
ビルドして動作確認
最後はきちんと動作するかビルドして確認します。
npm run devVueで作成したコンポーネントが表示されていれば成功です!

エンジニアにおすすめ書籍
エンジニアになりたて、これから勉強を深めていきたいという方におすすめの書籍はこちら!


複数のコンポーネントを作成して読み込ませたい
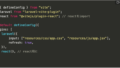
複数のコンポーネントを作成していきたい場合は、「resources/js/app.js」の内容を少し工夫すれば対応できます。
import { createApp } from "vue";
import ExampleComponent from "./components/ExampleComponent.vue";
import AnotherComponent from "./components/AnotherComponent.vue";

// コンポーネントのマッピング
const components = [
    {
        id: "example-app",
        component: ExampleComponent,
    },
    {
        id: "another-app",
        component: AnotherComponent,
    },
    // 新しいコンポーネントが必要な場合はここに追加
];

// コンポーネントを動的にマウントする関数
const mountComponent = ({ id, component }) => {
    const element = document.getElementById(id);
    if (element) {
        const app = createApp(component);
        app.mount(`#${id}`);
    }
};

// 各コンポーネントをループで処理
components.forEach(mountComponent);
あとは使用したい箇所で以下のように記述すれば対象のコンポーネントを表示できます。
<div id="example-app"></div>idと対象コンポーネントをマッピングして効率よくマウントするようにしています。
これはあくまで一例なので参考程度に。
Laravelの変数をVueで利用したい場合
Laravelの変数をVueのコンポーネント内で利用したい場合もあるかと思います。
その場合は、設定を少し加える必要があります。
以下記事で紹介していますので気になる方は参考にしてみてください。

まとめ
いかがだったでしょうか。
LaravelにVueを一部導入する流れを理解できたかと思います。
こういったケースが必要になるのは以下になるかと思います。
- すでにbladeでフロントを作成している
- フレームワークに全移行するコストがない
- 複雑なフロント表示は一部分で良い
Vueであればbladeに直接記述することもできますが、明確にファイルを分けて管理したい場合は参考になるかと思います。
ぜひお試しください。
vite環境でVueを一部導入する方法は以下記事を参考にしてみてください。